You’ll undoubtedly hear one request when people discover you can sew: “Can you hem my trousers?” It’s a running joke in the online sewing community that hemming trousers for people is one thing sewists will not do. Like, just don’t ask!
But all jokes aside, it’s always good to learn how to alter clothing to fit you the way you prefer. Knowing how to hem trousers is a useful skill. And it’s something you can do quickly and easily for someone (if you really want to that is). My mom recently asked me to hem a pair of trousers for her and I wanted to show you how it can be done in a few easy steps.
There may be a few other methods out there, but I like this one because it’s quick and efficient, especially if you are doing this for someone else. Here’s my step-by-step guide on how to shorten trousers and hem them professionally with a sewing machine.
How to Hem Pants With a Sewing Machine
Before you start, you’ll need to gather your supplies.
Here’s what You’ll Need:
- Trousers to be hemmed
- Measuring tape / Seam guide
- Fabric chalk, friction pen or a washable fabric marker
- Scissors or Rotary cutter and cutting mat
- Pins or sewing clips
- Iron
- Sewing machine
Step 1: Determine the New Hem Length
Before cutting, decide how much you need to shorten the trousers. Turn them inside out, put them on and fold up the hem to your desired length. Remember to try them on with shoes so you can make sure they’ll look right once cut. Use an iron to press a crease at the fold – this will serve as a guide for your new hem. If you are doing this for someone else, you could get them to complete this step before giving you their trousers for alteration.
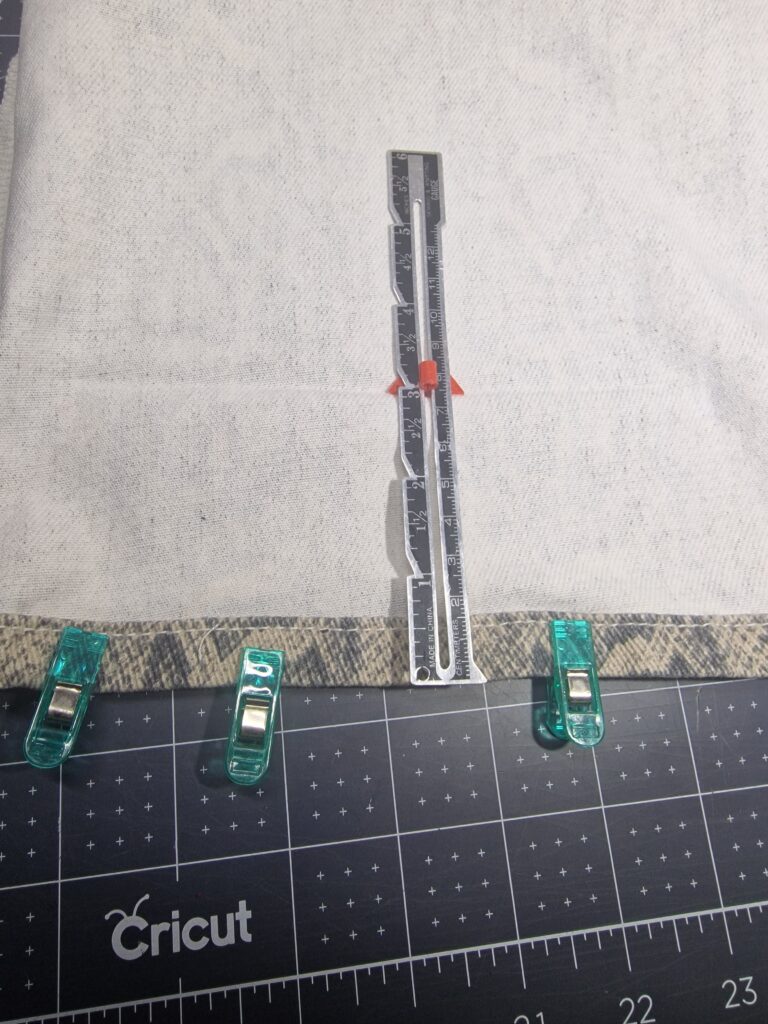
Step 2: Measure and Mark
Using a seam guide or a measuring tape, measure from the fold mark down to the original hem. Be sure to check that this measurement is consistent around the leg. Mark this line with fabric chalk or fabric marker. I used one of those friction pens with ink that dissolves with heat.
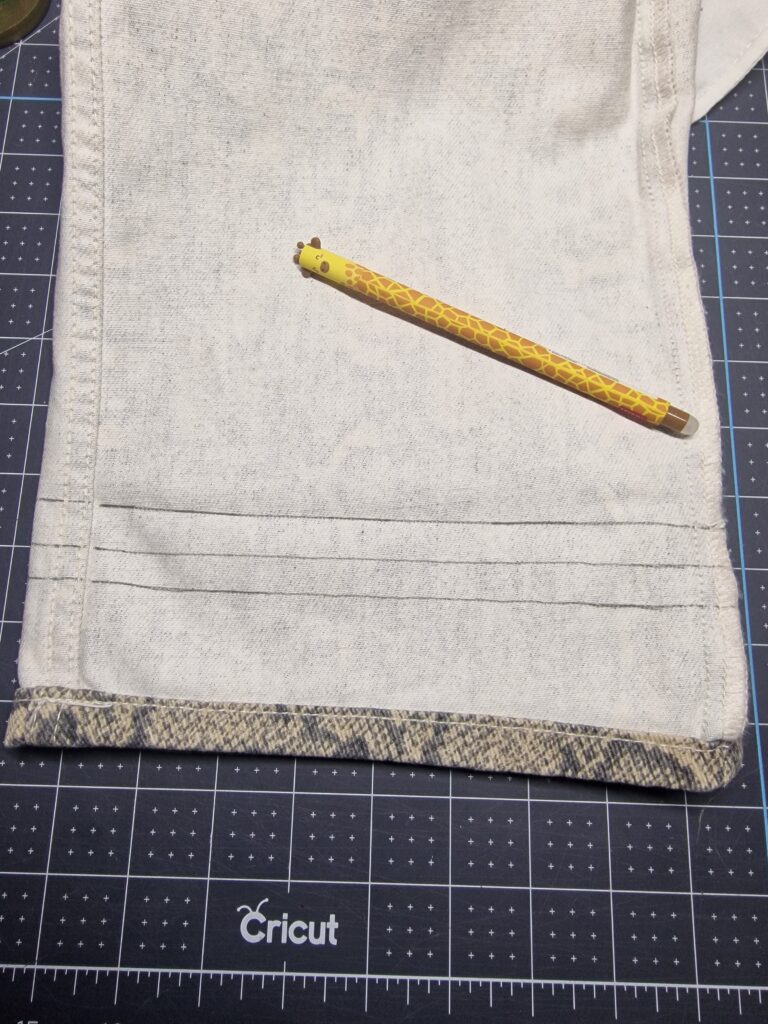
Step 3: Add Seam Allowance
To create a neat and durable hem, we will use a double fold but first, we need to add the seam allowance. To do this we need to mark two additional lines below the fold mark:
- The first line should be 1/2 inch below the fold mark.
- The second line should be another 1/2 inch below the first. This extra fabric allows us to create a clean double-fold hem.
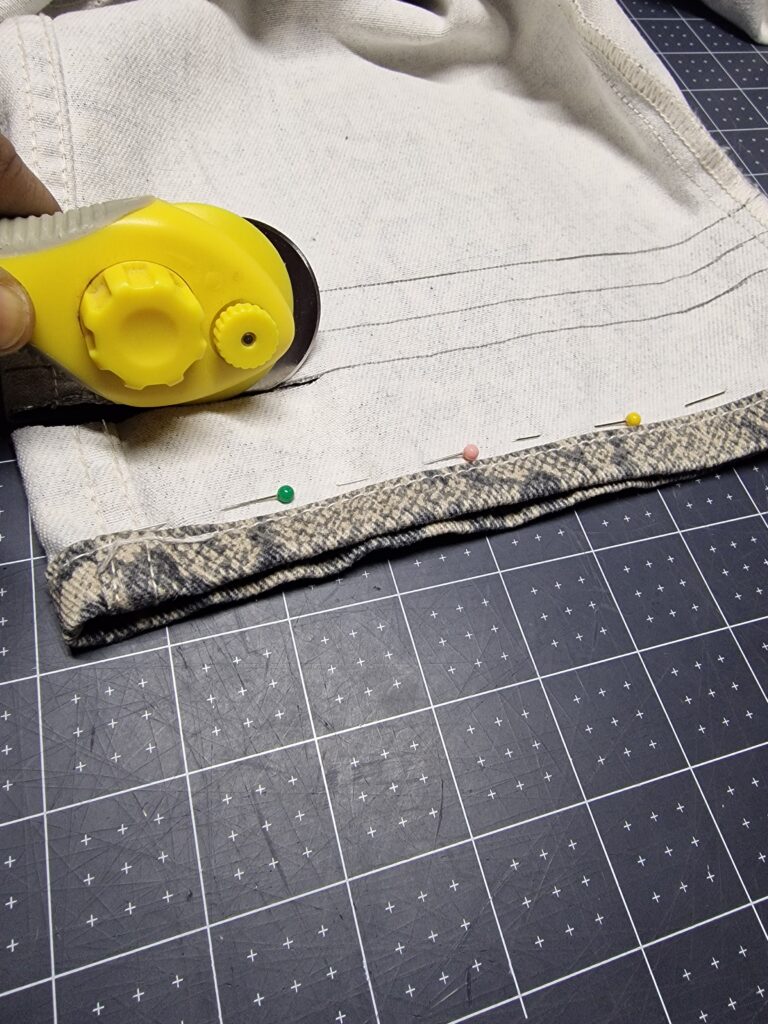
Step 4: Cut the Excess Fabric
Cut along the lowest marked line. Try to keep the cut even and smooth.
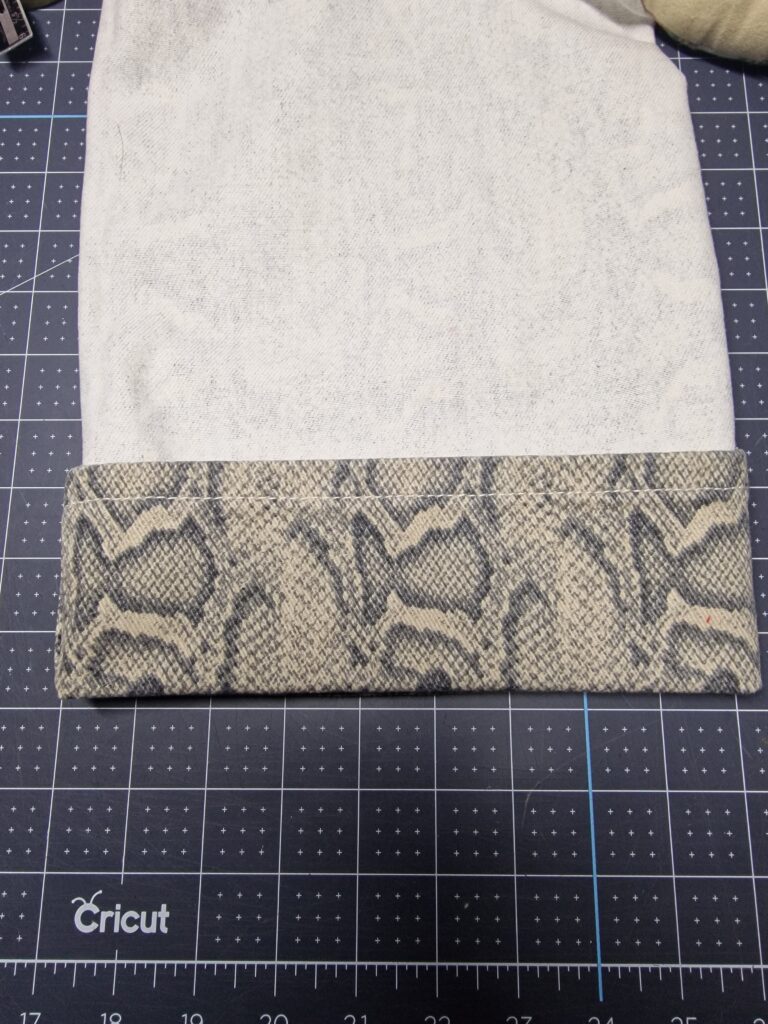
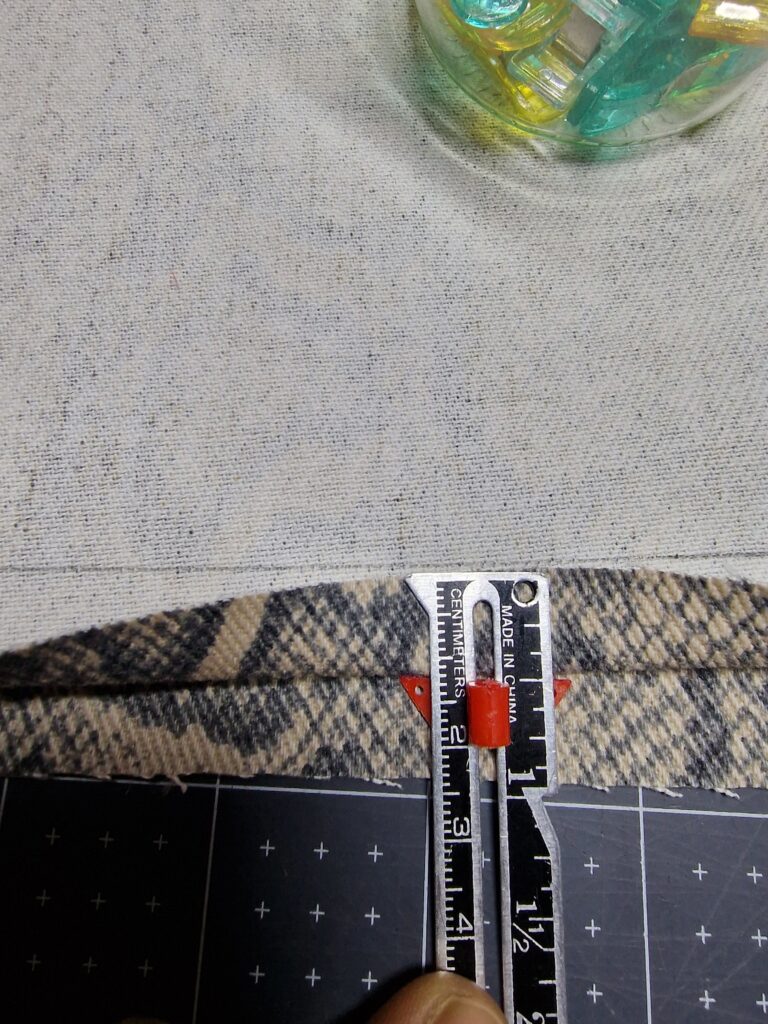
Step 5: Fold and Press
We’ll create the double-fold hem by folding and pressing the raw edges up and using the lines we created as a guide.
- Fold the raw edge up by 1/2 inch and press with an iron.
- Fold it up another 1/2 inch and press again.
- Pin or clip the folded edge in place to prevent shifting while sewing.
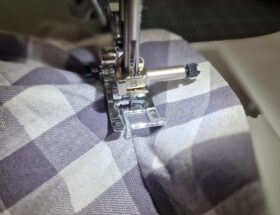
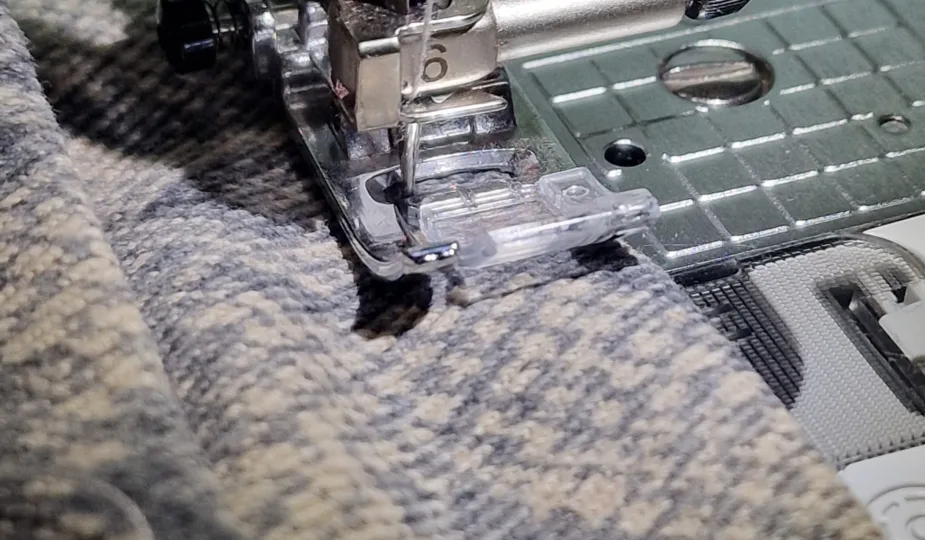
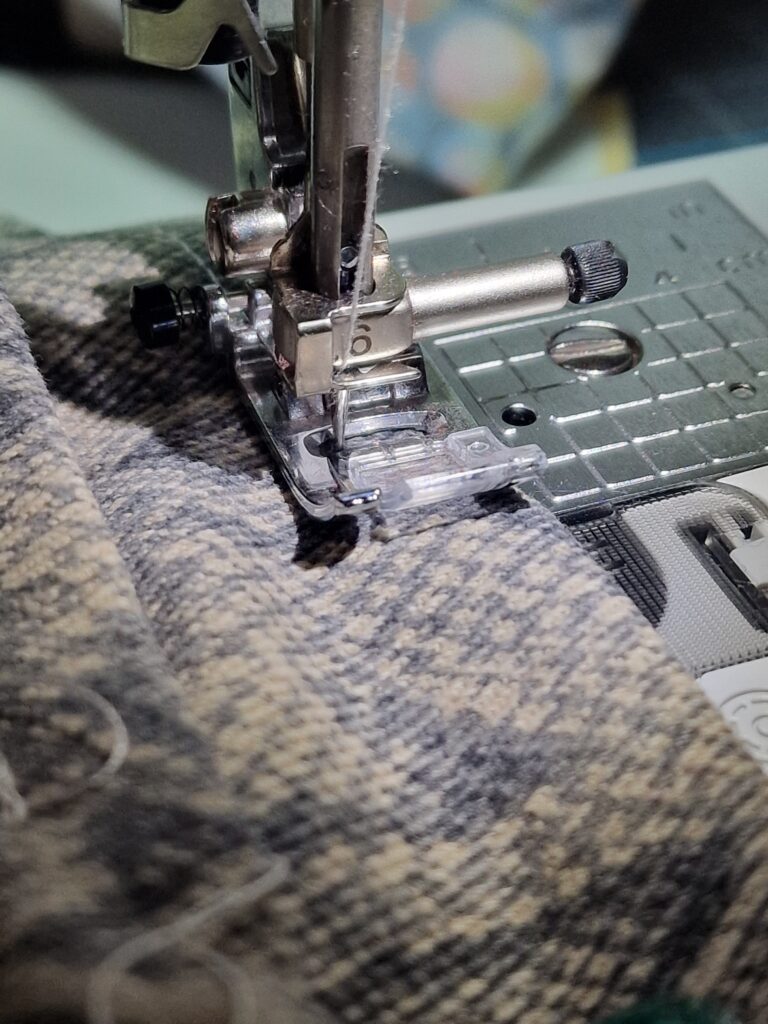
Step 6: Sew the Hem
Using a sewing machine, stitch close to the inner folded edge, maintaining a 1/2-inch seam allowance. Take your time to ensure your stitches are even for a professional finish.
Step 7: Press the Finished Hem
Once the hem is sewn, give it a final press with the iron to set the stitches and remove any creases.
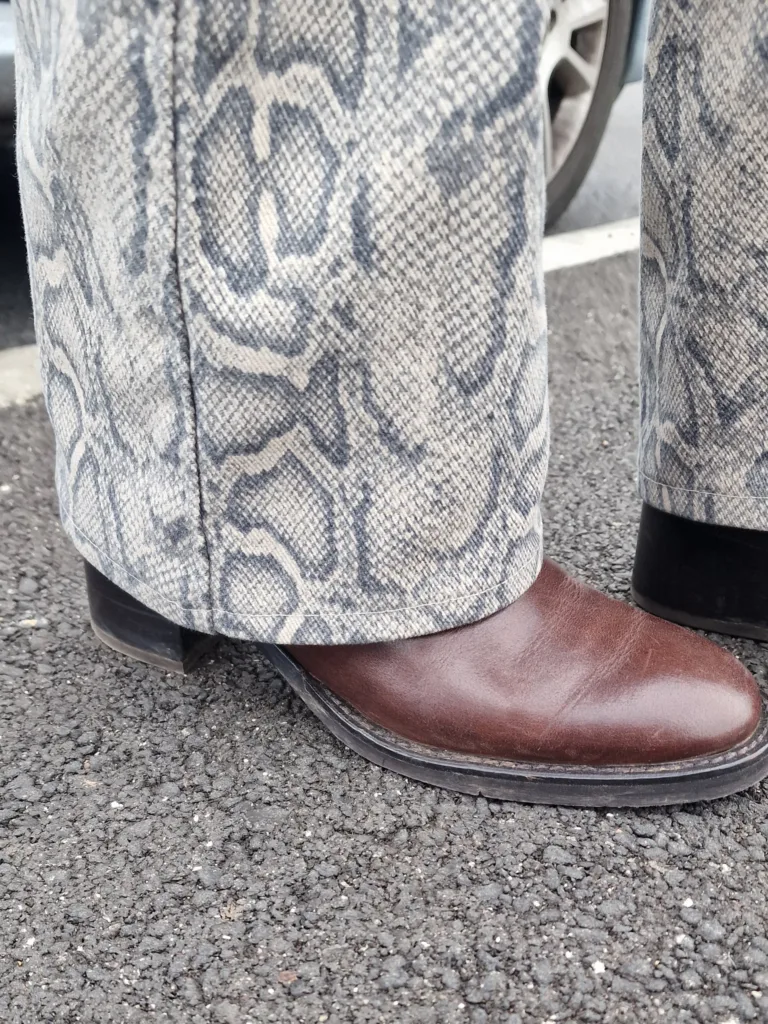
You’re All Done!
When it comes to sewing basics, hemming trousers is an easy way to tailor your clothing for the perfect fit. The next time someone asks “Can you hem my pants?” you’ll be fully equipped to take on the job. You can download a PDF version of this post to keep it handy. Download a PDF tutorial below.
If you’re just getting started on your sewing journey and you want some more tips, here’s an A to Z of Sewing Terms to help you figure out sewing jargon.
Happy sewing!